cb
Version, currently 2.0.055 versions
- 3.7.0latestJun 4, 2026
- 3.6.7not indexedJun 4, 2026
- 3.6.6not indexedJun 4, 2026
- 3.6.5not indexedJun 4, 2026
- 3.6.4not indexedJun 4, 2026
- 3.6.3not indexedJun 4, 2026
- 3.6.2not indexedJun 4, 2026
- 3.6.1not indexedJun 4, 2026
- 3.6.0not indexedJun 4, 2026
- 3.5.1not indexedJun 4, 2026
- 3.5.0not indexedJun 4, 2026
- 3.4.4not indexedJun 4, 2026
- 3.4.3not indexedJun 4, 2026
- 3.4.2not indexedJun 4, 2026
- 3.4.1not indexedJun 4, 2026
- 3.4.0not indexedJun 4, 2026
- 3.3.3not indexedJun 4, 2026
- 3.3.2not indexedJun 4, 2026
- 3.3.1not indexedJun 4, 2026
- 3.3.0not indexedJun 4, 2026
- 3.2.0not indexedJun 4, 2026
- 3.2.0-dev1not indexedJun 4, 2026
- 3.1.0not indexedJun 4, 2026
- 3.1.0-devnot indexedJun 4, 2026
- 3.0.2not indexedJun 4, 2026
- 3.0.1not indexedJun 4, 2026
- 3.0.0not indexedJun 4, 2026
- 3.0.0-devnot indexedJun 4, 2026
- 2.2.1not indexedJun 4, 2026
- 2.2.0not indexedJun 4, 2026
- 2.2.0-devnot indexedJun 4, 2026
- 2.1.0not indexedJun 4, 2026
- 2.1.0-dev4not indexedJun 4, 2026
- 2.1.0-dev3not indexedJun 4, 2026
- 2.1.0-dev2not indexedJun 4, 2026
- 2.1.0-dev1not indexedJun 4, 2026
- 2.0.0not indexedJun 4, 2026
- 1.3.0not indexedJun 4, 2026
- 1.3.0-rc3not indexedJun 4, 2026
- 1.3.0-rc2not indexedJun 4, 2026
- 1.3.0-rc1not indexedJun 4, 2026
- 1.2.0not indexedJun 4, 2026
- 1.1.0not indexedJun 4, 2026
- 1.0.0not indexedJun 4, 2026
- 0.7.5not indexedJun 4, 2026
- 0.7.4not indexedJun 4, 2026
- 0.7.3not indexedJun 4, 2026
- 0.7.2not indexedJun 4, 2026
- 0.7.1not indexedJun 4, 2026
- 0.7.0not indexedJun 4, 2026
- 0.6.0not indexedJun 4, 2026
- 0.5.0not indexedJun 4, 2026
- 0.4.0not indexedJun 4, 2026
- 0.3.1not indexedJun 4, 2026
- 0.3.0not indexedJun 4, 2026
github.com/CrunchyData/bridge-cli
CLI for Crunchy Bridge
28 stars
0 dependents
License: GPLv3
Nothing has been indexed for 2.0.0 yet. The tag is recorded, its shard.yml has not been read, so the manifest and dependency list below are empty because they are unknown rather than because they are absent.
Installation
# Add this to your shard.yml
dependencies:
  cb:
    github: CrunchyData/bridge-cli
    version: ~> 2.0.0
Then run:
shards installshard.yml
No shard.yml has been indexed for 2.0.0. You can read it on the repository.
Dependencies
Unknown: the shard.yml for this version has not been read yet.
README
This README is the one indexed from the repository at its latest ref, not from the tag for this version.
# cb A CLI for Crunchy Bridge with very good tab completion. 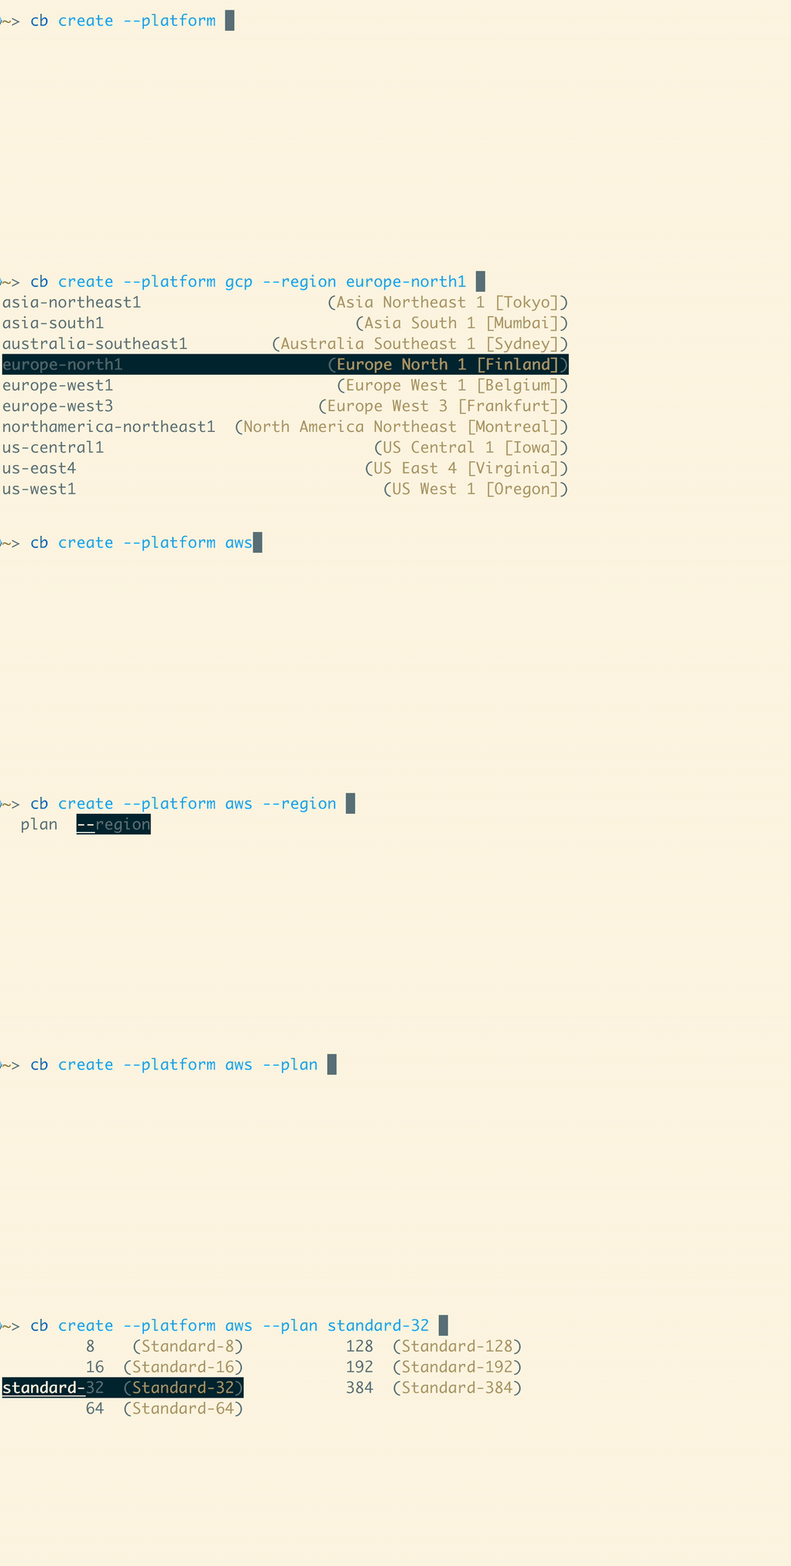 ## Installation - For homebrew (on [macOS](https://brew.sh) or [linux](https://docs.brew.sh/Homebrew-on-Linux)) `brew install CrunchyData/brew/cb`. This will install both `cb` and the fish shell tab completions for you. - For others, download the [latest release](https://github.com/CrunchyData/bridge-cli/releases), put it somewhere in your path, and be sure to manually install shell tab completions from the `completions` directory. ## Getting started First login to your Crunchy Bridge account by running `cb login`. ``` $ cb login Press any key to open a browser to login or q to exit: Waiting for login... done Logged in as user@example.com ``` If you'd prefer to use an API key then you can create one for your [account](https://crunchybridge.com/account/api-keys) and set the `CB_API_KEY` environment variable. **Note:** If the `CB_API_KEY` environment variable is set, then `cb login` will not work until it is unset. ## Usage Once you are logged in, you can run `cb list` to see all of your clusters, and `cb psql <cluster id>` to securely connect to your database or `cb scope` to run health checks against it. There are many more commands that you can use to manage things such as log destinations, firewall rules, and more. To see what commands are available run `cb --help`, and to see more detailed information for a given command add `--help` to it, for example `cb create --help`. If you use the [fish command line shell](https://fishshell.com) and have the completions installed for you (either automatically through homebrew or otherwise), nearly all arguments can be intelligently completed for you. This includes all cluster IDs available to just your account, in addition to normal subcommands and flags. Also where possible the current arguments you've given are taken into consideration. For example if you're creating a new cluster on AWS, instances sizes on Azure or regions in GCP will not be shown. ## Development Install dependencies: [crystal](https://crystal-lang.org/install/) You can run quick checks by executing `src/cli.cr` directly. While this can be handy, it is slow because the executable is being built each time, then executed. To build a development version run `make` or `shards build`. The binary will be at `bin/cb` by default. There is a helper script `dev_setup.fish` which puts the local bin directory in your path so the `cb` in that directory will be ran, as well as an `scb` alias for running `src/cli.cr`. It will also set up completions for each. `crystal tool --format` will format the code as required. It is useful to have your editor run this for you on save. ### testing You can run `crystal spec` to run all of the specs, or `make test` to also run linting checks. ### nix If you install nix, the included flake devShell will automatically have all dependencies, and you can simply run `check` to run all specs and linting. ## Contributing 1. Fork it (<https://github.com/CrunchyData/bridge-cli/fork>) 2. Create your feature branch (`git checkout -b my-new-feature`) 3. Commit your changes (`git commit -am 'Add some feature'`) 4. Push to the branch (`git push origin my-new-feature`) 5. Include an entry in the changelog 6. Create a new Pull Request
Documentation
Built from the current release. The first visit to a release nobody has asked for starts its build.
Links
This release
- Version
2.0.0- Tagged
- Jun 4, 2026
- Commit
388777ad2536- Indexed
- not yet
Dependents
No indexed shard depends on this one yet.
Repository
github.com/CrunchyData/bridge-cli
Metadata
- Created
- Aug 12, 2026
- Updated
- Aug 12, 2026
- Synced
- Aug 12, 2026
- Versions
- 55